
Tools Needed:
Angle Grinder
Hearing and eye protection
5/32 Allen Wrench
7/16(11mm) Wrench
Philips Driver
Diagonal Cutter
Marker
Center Punch or Scratch Awl
Pilot Drill
10-24 Pass-through Drill
Materials Needed:
Loc-Tite
Masking Tape
Sound Mat (see info page)
My friend Tim was nice enough to bring me his new 100 series to let me cut a big hole in it’s tailgate. So, first up we’ve got the truck:
Lucky for him I had a lid ready to go, and lucky for the rest of you waiting on 100 series tailgate lids, it gave me a chance to get some good installation photos.
Note that we’ve got that pretty 100 series paint and glass protected with some blankets and I’ve placed a piece of cardboard inside the cargo area and closed the liftgate down to hold it in place.
The blankets are there since the best way to make the cuts on the 100 series trucks is with an angle grinder and cut off wheel. This works well, but throws a lot of sparks so we need to make sure the paint and glass are protected.
The cardboard is to help keep dust and debris out of the cargo area. The piece that the tailgate lid comes wrapped in works perfect for this.

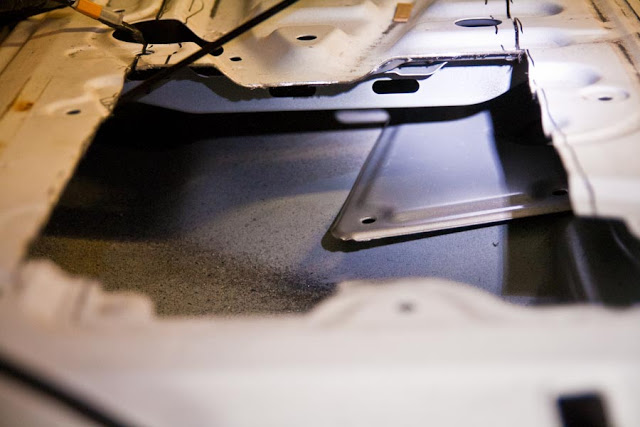
From there we just pull off the carpet pad.
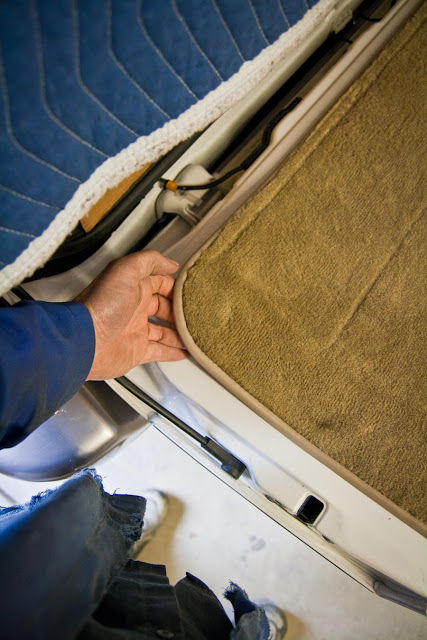
And we are left with this:
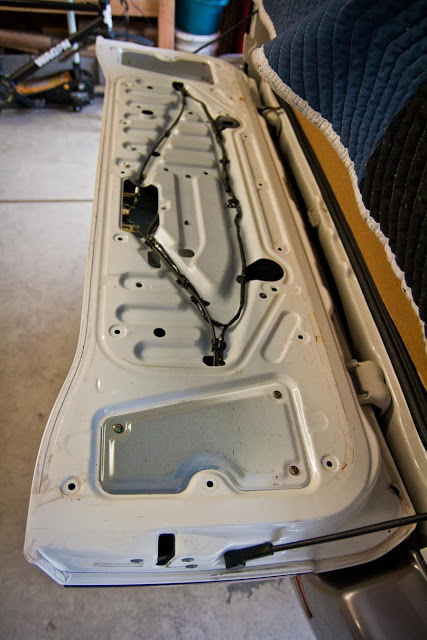
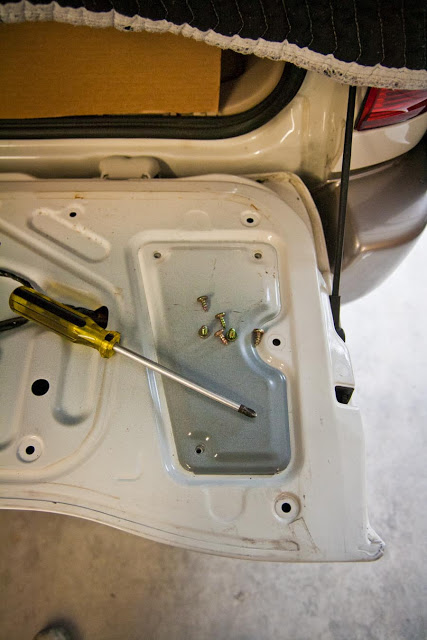
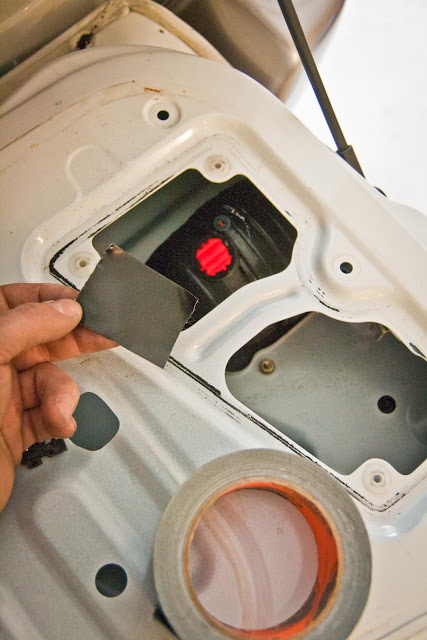
Remove the access panels.
Cut off the wire retainers.

And pull the taillight bulbs (remove them from their plugs and set them aside so they don’t get broken).
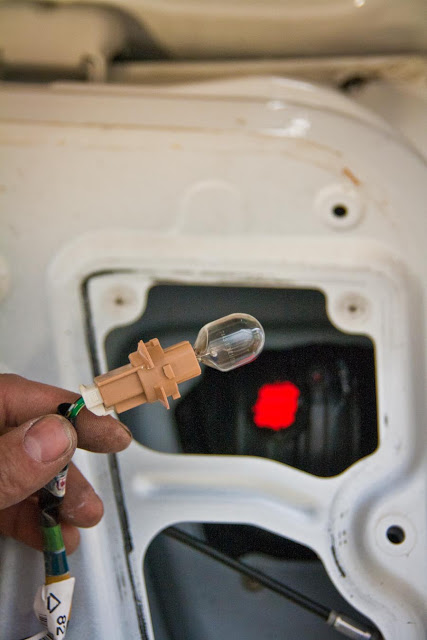
At this point we are trying to get the wires and cables out of the way so we can make the cuts, it might be tempting to remove the plug from the lock cylinder with it all in place, but the “plug” is very fragile, I think it’s best to remove the lock cylinder, drop it through the outer skin and remove the plug where you can see what you’re doing. In typical Toyota style there is a handy slot so you can take a long screwdriver and lever the lock clip out of place.
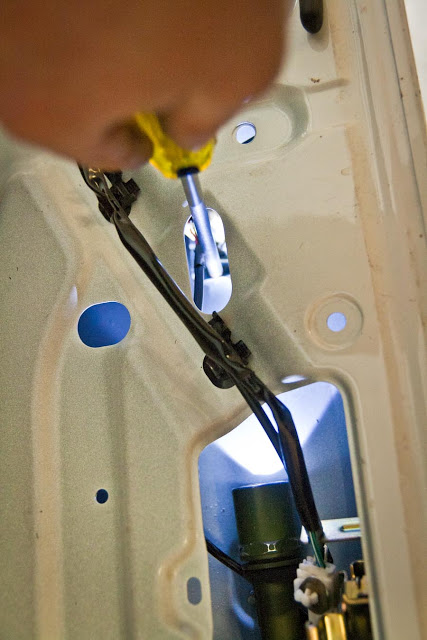
Then you can drop the cylinder through the skin, here the plug is half removed, you can see why it would be easy to break.
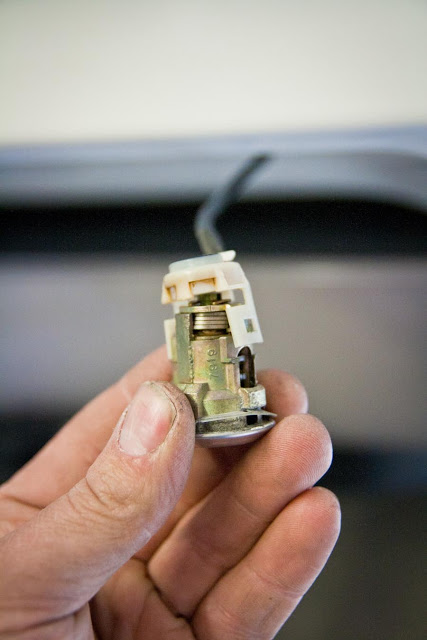
And the clip by itself:

And we have our bundle of wires that we can set aside, a lot more complicated than the other Cruiser tailgates. :p

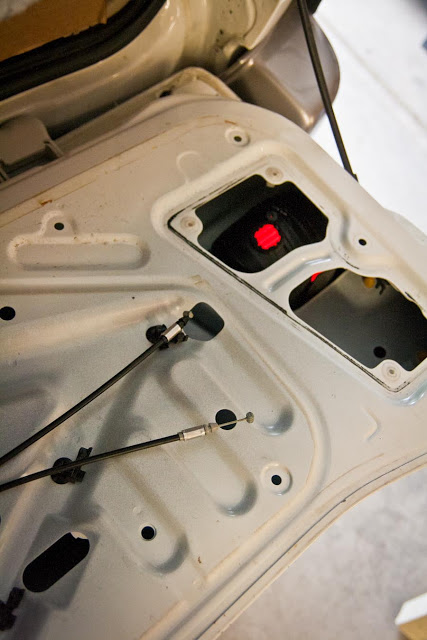
On to the cables; they slide out of their lock collars and then you twist them around to remove the barrels from the actuators, very typical cable setup, be careful to not break the retainer ends though, they are just plastic and I have heard that you can not purchase just new cables, you have to buy the whole latch setup. Rather than just pulling/prying outwards on them try gently twisting them while coaxing them out towards you, this helps them walk out of their notches.
Cable ends out:
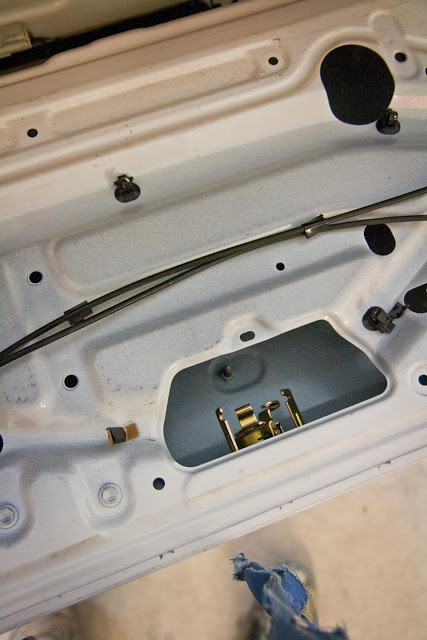
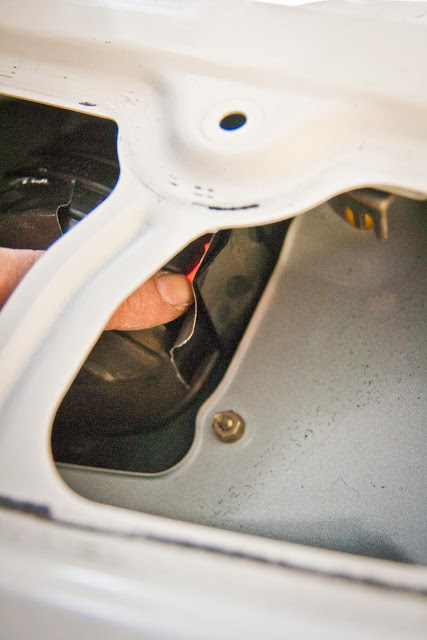
You can remove the whole taillight assemblies if you wish, but I did not find that they got in the way during the instal. There is a large hole where the bulb holder was removed:
If you leave them in place you will want to tape over the openings in order to keep dirt and sparks out of them.
But there are also partially covered vent holes on the top edges, be sure to tape those up as well.
On to the cutting. First up, face shield:
Wear one.
You will be using the cutoff wheel on the vertical, if you bind it up and it cracks apart there will be shrapnel flying right at your face. In most cases goggles are just fine, but not here.
It’s going to be loud, don’t be an idiot, wear some kind of ear protection, hearing loss does not “grow back”.
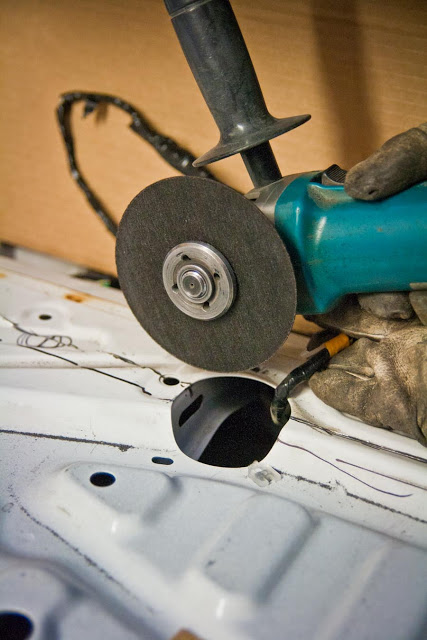
Note the disks, these are high quality cutting disks, they are thin and very strong, they are not from Harbor Freight. I don’t care if your grinder is from HF, but do yourself a favor and buy good wheels.
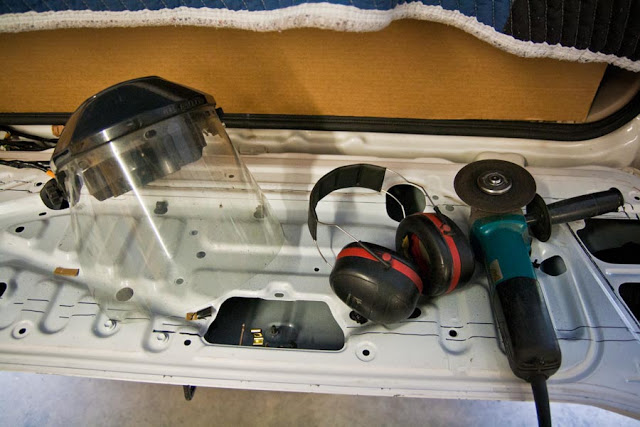
Use good quality cut-off disks
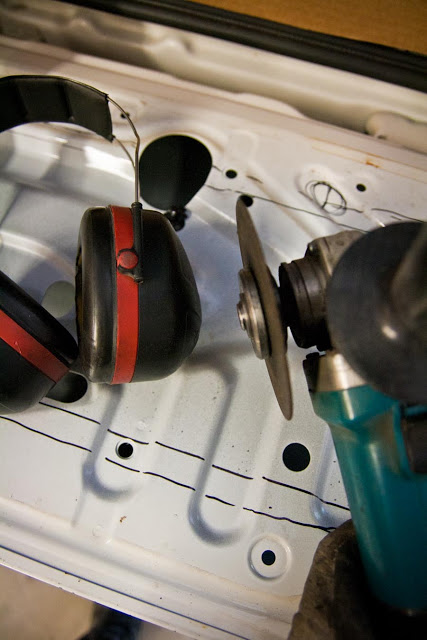
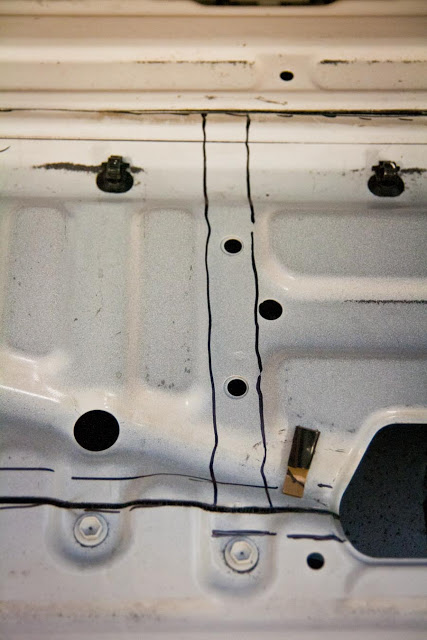
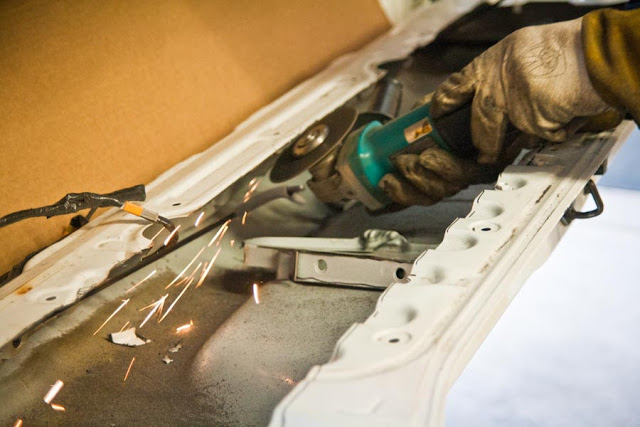
After that, we’ve traced the outline of the cut for the gate (there is a cardboard template that will be packed with the lids, but no pics of that since I still had to get the dimensions at this point) and marked out where the reinforcing ribs are for reference.
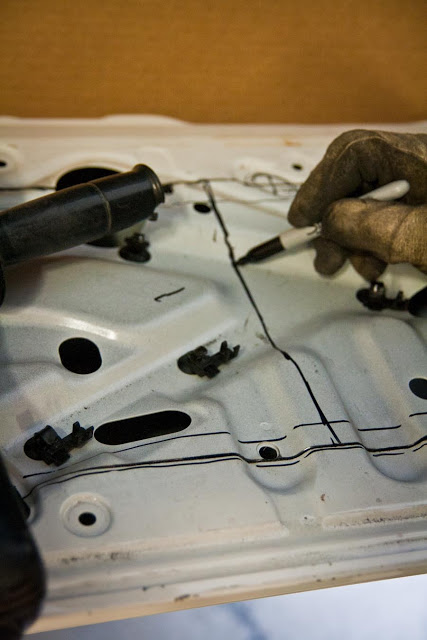
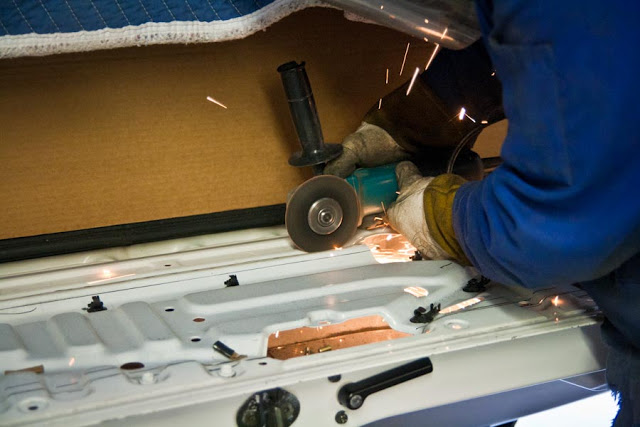
All that’s left to do now is follow along the line with the grinder.
Don’t cut the wires though.
There is enough room to come into the corners with a square cut.

Did I mention to not cut the wires?
Once you’ve got the perimeter cut things will still be quite solid, there are three nice strong ribs to deal with still. Mark out each side of where the ribs are.
Then cut out on each side of the ribs.

The ones on the ends will get popped up by the lift assist spring.

After that you will start to have some parts to toss on the floor, here are the two ends removed.
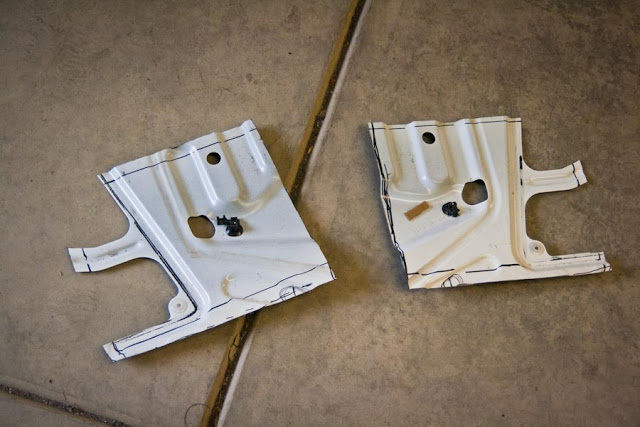
By cutting on each side of the ribs you can remove the inner panel and see exactly what you are dealing with.

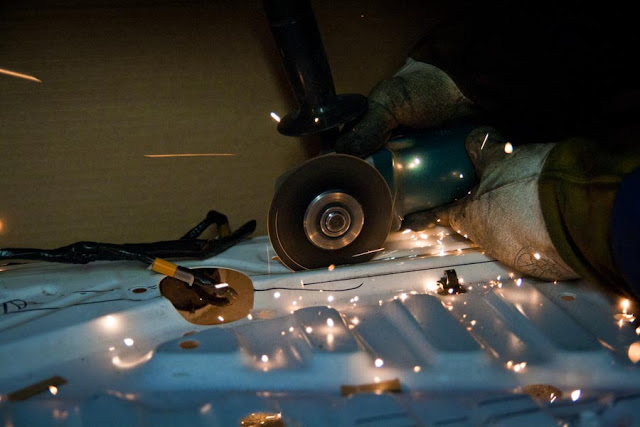
You can then deal with the ribs individually by cutting in on an angle.
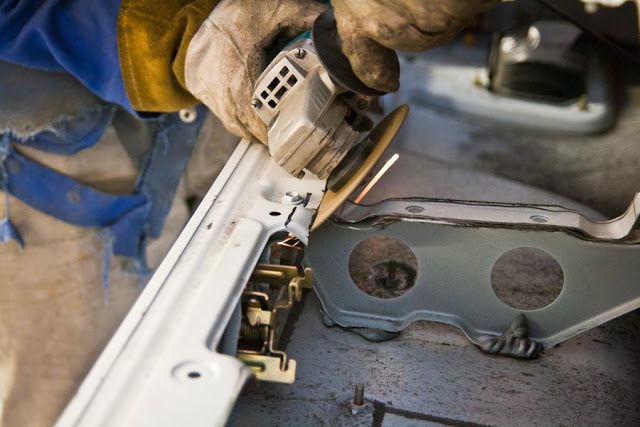
The angle cut
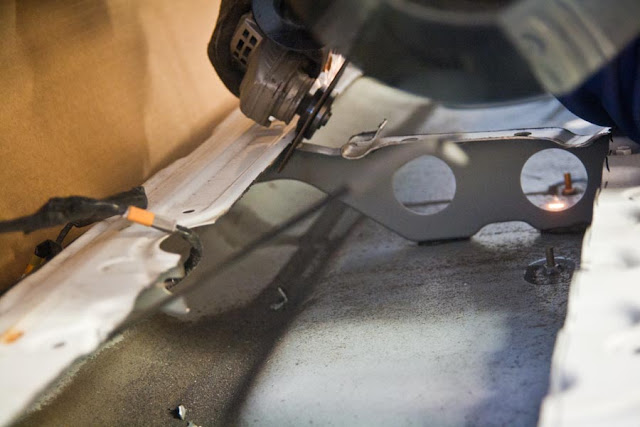
With the two outer ribs the cuts that need to be made are quite close to the outer skin, pay attention to what you are doing, no need to destroy your paint job. For a bit of extra security it’s a great idea to take one of the access panels removed earlier and place it under where you are cutting. Any slip or over-cut will hit this before hitting the metal you want to protect.
With all the ribs removed go back in and clean up any sharp corners, after the cut off wheel I hit them all with a flap disk to get rid of any burs.
At this point you’ve made a mess, time to clean it up.

Also time for a bit of preventative rust proofing. Anytime I’m putting in a tailgate lid, before I put the sound mat in place, I take this opportunity to put a tiny bit of ATF in the folded over pinch weld all along the bottom of the gate. This is a major moisture trap and even in dry climates the tailgates all start to rot out before the rest of the truck in this location (just take a look at any 60 series). The ATF is a very fine fluid that gets into incredibly tight spaces (actually penetrates the folded layers of metal) and it will also wick up against gravity. Perfect for preventative rust-proofing.

Then on to the sound mat. I like to start off on the bottom of the gate by cutting little rectangles of the material, these are easy to fold and tuck into the corner at the bottom.
A good clean tailgate lid install really requires a bit of foil backed sound mat to finish things off. The best time to do this is before bolting the lid in since it’s so easy to get to everything that way.
The matting helps protect the outer skin, dampens some vibrations, but most importantly cleans up, seals off, and brightens up the space. The best storage in the gates are the stuff-spaces in the corners, with the bright foil you can really see what you’ve got stuffed in there.

These are going to keep things from migrating all the way down into the pinch weld area. It looks a bit messy at first, but once you get the corner filled you can come back in with a nice clean straight strip of the material and overlap all the random edges. Or, just slap the stuff in there however you prefer. :p Here is that nice clean first strip in place, already looking a lot more orderly.
Going in this order also helps keep the sound matt from peeling away with wear, if you think of it like a roof surface, you want the overlaps to go with the direction of travel (downhill) in this case the things in the gate will drift down when you lift the gate to close it, with the overlap this way, those things can not catch on the edge and start to peel back the foil from the adhesive.

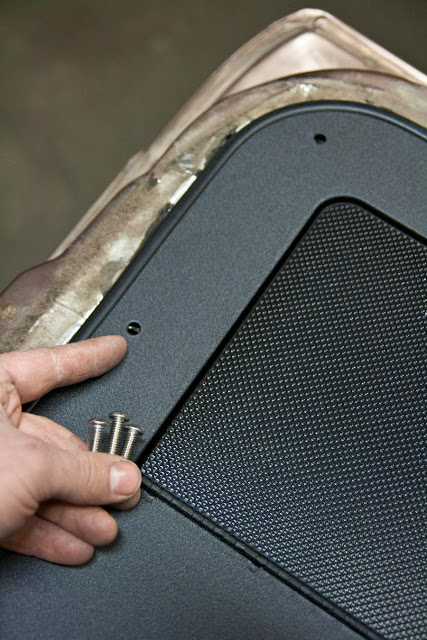
Once you are all set with the sound mat, just drop the lid in place and start to line up the holes. We want to deal with the mess of wires at the same time so lids will come with some cushion loops to help tuck the wires up out of the way.

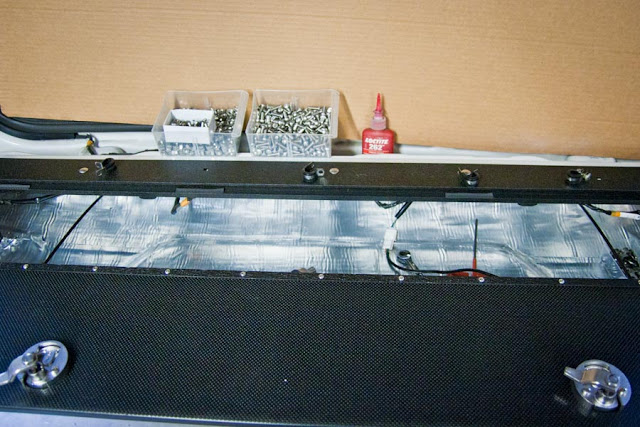
Here you can see the locations for the 4 cushion loops, they will attach to the back of the carriage bolts on the leading edge of the gate. Also sitting there out of sight are a 5/32 allen key, an 11mm gear wrench (since I only have metric gear wrenches) and a 7/16s socket for the few nuts that are hard to get to with the gear wrench (like the ones on the cushion loops).
You can also see my bottle of loctite sitting there. As you put the hardware in place it’s important to but a dab of thread locker on there, not only to keep all the hardware in place, but also since the hardware is 18-8 stainless. It has good corrosion resistance and is much more cost effective than 316 hardware, but it will tend to gaul up if you crank down on it. The loctite provides a protective film to help prevent the friction that causes gauling, then, once it cures, it helps keep the lock nuts in place, the tailgate sees a LOT of vibration.
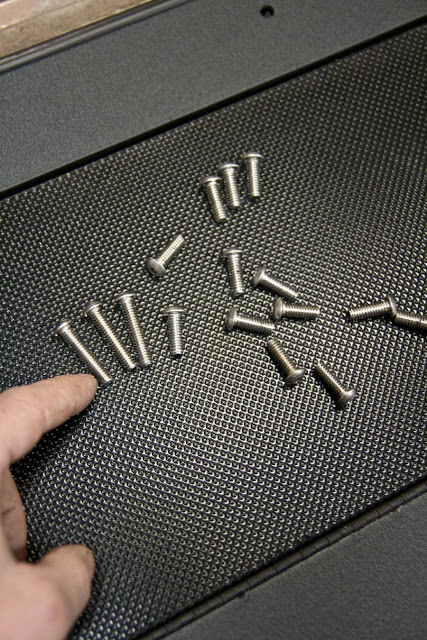
At this point I need to revert back to some older photos for the bolt locations. With the hardware you will notice three different styles, there are carriage bolts for the edge that interacts with the set plate, regular .75″ button heads for the majority of the holes and 3 1.25″ button heads for the two ends and one spot on the front edge. The longer bolts are easy to pick out.
The first two go in the center holes on the ends of the lid.
Other end:
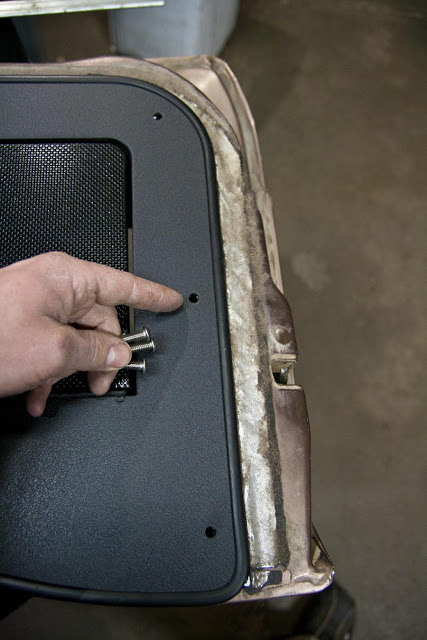
The last one goes in the second hole in from the left on the front edge, here:
(where the allan key is pointing)
It’s there as a very low-tech cable holder, the latch cable on that side likes to pop down into the storage space, this longer bolt provides a spot to tuck the cable up behind and out of the way.
One last thing to note on the hardware is the center hole in the front, it’s really difficult to get to. What you will want to do is leave off the washer in this one spot, set the nut in place and then use the allen key to line the nut up with the hole, then thread the bolt in from the top until the nut binds up and you can snug it down.
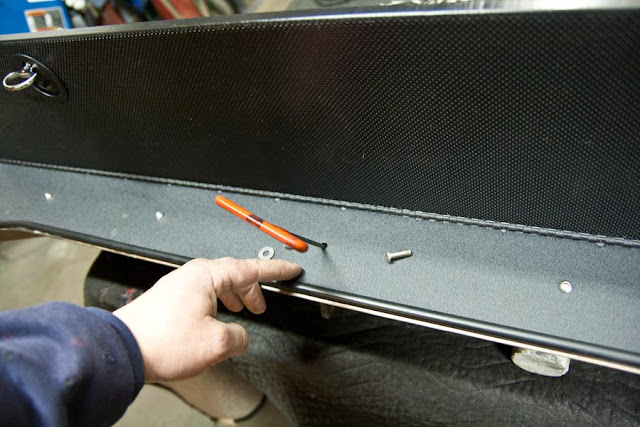
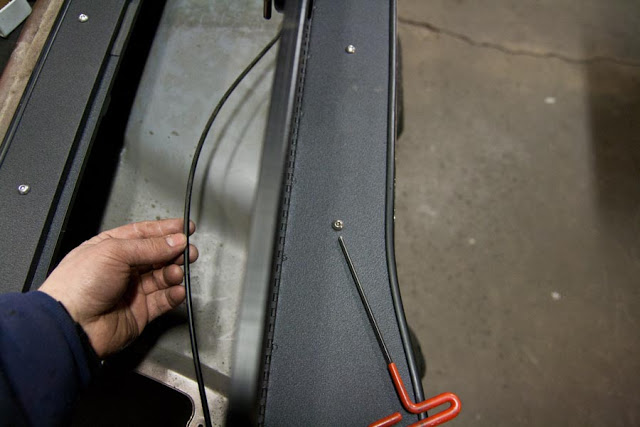
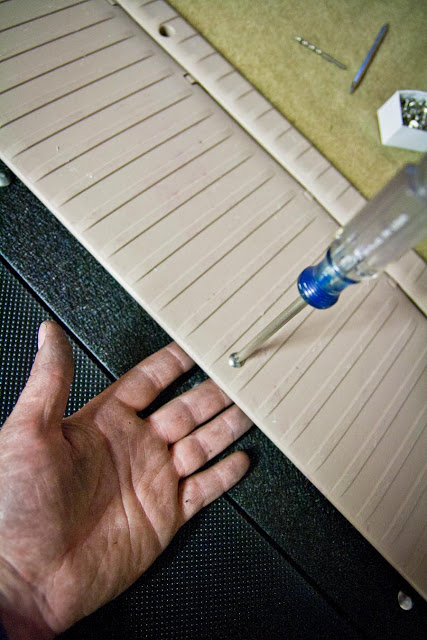
That pretty much gets the lid itself into place so it’s on to the set plate bumper strip. The bumper is a strip of plastic with threaded inserts in it and a rounded over leading edge to help make sure the set plate slides smoothly over the gate surface. The strip also reinforces the set plate so that it will stay a bit more stable over time. For this part of the process you will need some kind of a scratch awl or thin screwdriver, put the strip in place on the bottom leading edge of the set plate, insert the scratch awl into the center hole and slide the strip and awl back and forth to mark out a linear location of the hole.

If you look closely at this pic you can see the scratch left by the awl. The scratch goes from left to right and now that the bumper is out of the way, you can center your first mounting hole between the ribs of the set plate. Now you have to do a little bit of eye-balling, you need to drill a hole on your line in the center of that center rib. If you get it off to one side or the other all your other holes will be off as well and the fasteners will not sit down in the center of those ribs nice and neat-like
(make sure you are on the rib in the center of the set plate).

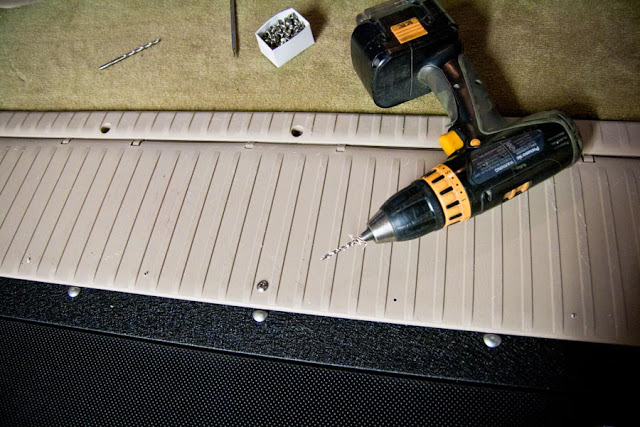
Once you’ve got that hole drilled (large enough to pass through a 10-24 bolt) bolt just that center hole in place.
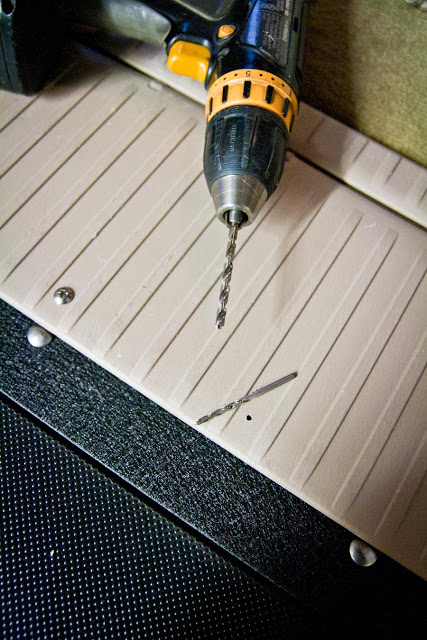
Then, with the bumper strip locked in place from left to right, take a drill small enough to pass THROUGH the 10-24 threaded inserts and use them as pilots to drill out the rest of the hole locations.
Then, remove the strip and enlarge those pilot holes so that the 10-24 bolts will pass through them.
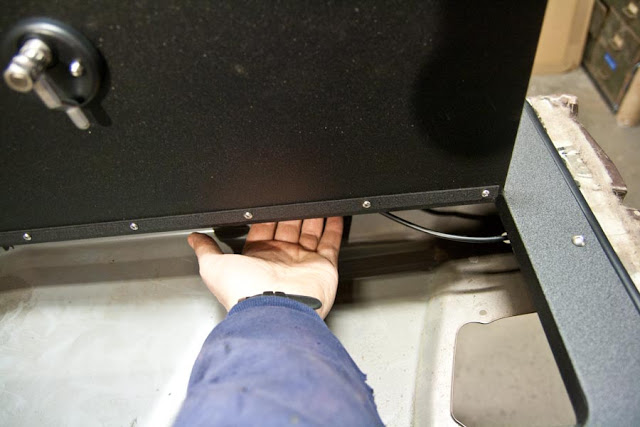
Then bolt the whole thing in place.
If you are careful with this you will end up with a nice neat line of fasteners like this:
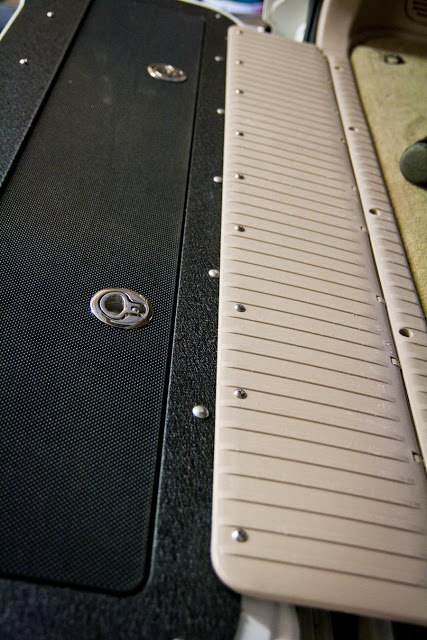
And that’s pretty much it, you’ve got a sturdy durable surface that gives you access to a whole bunch more storage space. (my sales pitch of: “Way too much money to spend on a little bit more storage space” still holds true, but at least with the massive amount of wasted space inside the 100 series gates you are getting a bit more of a return).
The set plate bumper lets the plate slide smoothy over the gate and latches.

And you can leave the lift assist springs in place if you feel like

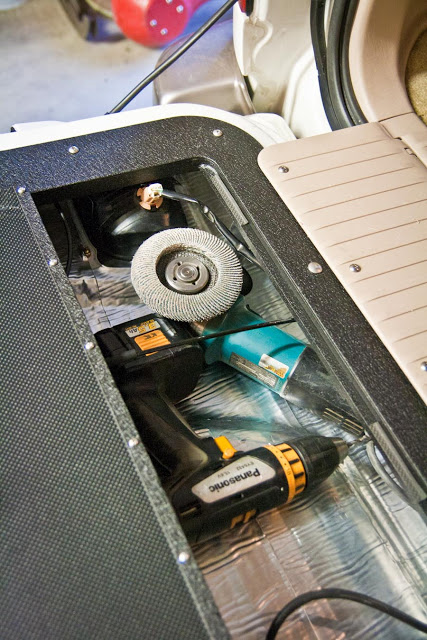
Time to put your tools away: (note, that was supposed to be funny :p, don’t store heavy tools in there, you have to pick up whatever you store in there every time you close the gate)
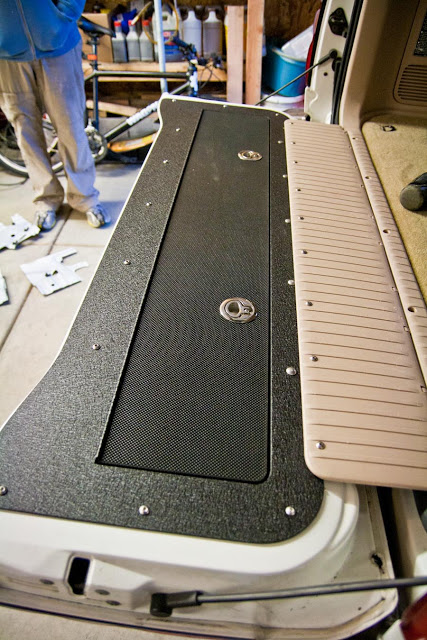
Here you can see the first production 100 series lid ready to get wrapped up and head out to it’s new home.
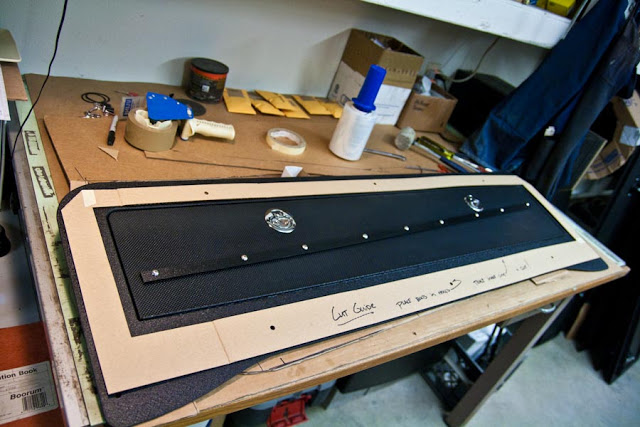
This pic shows the cardboard template that will help with the cut layout.
A final instal note for Australian customers:
I’ve got more 100 lids in Australia than I do here in the states (which is still not that many at all) and In two cases so far we have run into a discrepancy with the newer Aus. spec trucks, 2004+ not sure the exact date ranges yet; In these cases the tailgate lock cylinder is held in with a bracket and two bolts that the tailgate lid install removes. One fellow made a simple bracket to hold the cylinder and the other just removed the cylinder and put a rubber plug in the hole (which is more in line with what we do over here since our lock cylinders are very fragile and in the way of some of the storage, The new bracket would be easy to fab, but none of our trucks over here have that kind of bracket so I’ve got nothing to build off.
Just a heads up on that.