

Tools Needed:
Ruler
Wrenches, 9/16 and 5/8s I think? Need to look that up
10mm wrench
10mm Socket on an extension (to remove washer bottle)
Wire Terminal Crimp
Materials Needed:
My Antenna Mount
The OE Antenna Grommet
-This mount is designed to work with Firestik “Fire-Ring” style of CB cable-
(The following part numbers are links)
AR1A -Splitter
FL4B -Antenna
K48R18 -Fire Ring
SS3H -Spring Base
SWR Meter? (pn- SWR1)
(Any basic one will work)
And- if you want to use it as a CB- a CB radio. I like the Cobra WX ST for a nice unobtrusive instal.
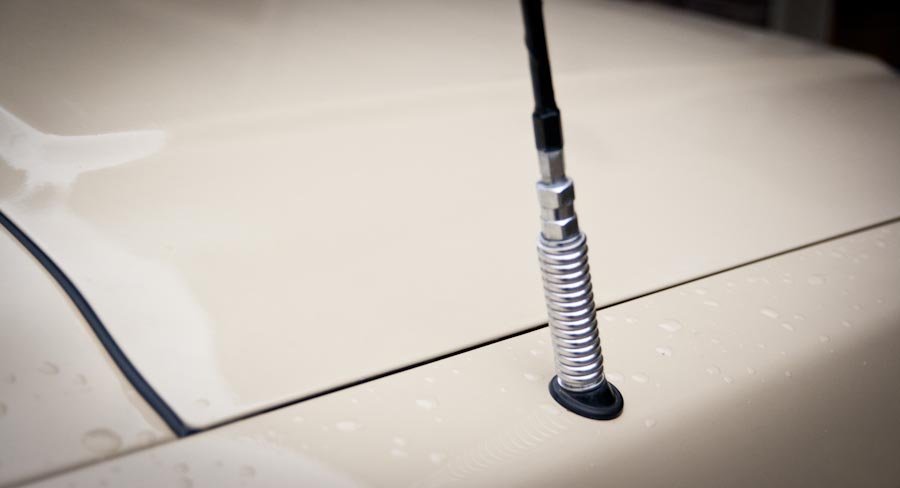
Installed mount.
Yup, that’s it, not much to look at, but that’s kind of the point, an unobtrusive dual purpose antenna mount.
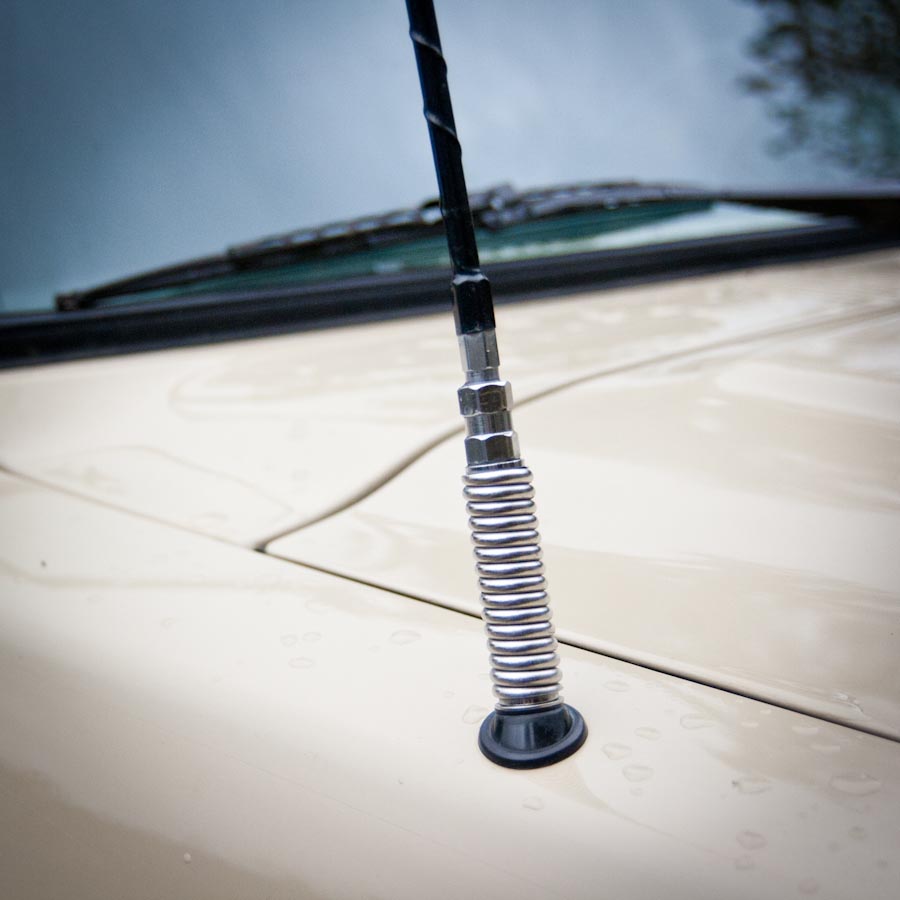
It is a very basic set of hardware consisting of a bracket to bolt to the factory antenna mount location inside the front fender, a threaded rod to extend up through the fender, and all the hardware needed to bolt it in place, wire the new ground wire and attach the other required antenna parts.
The other needed parts can all be sourced from Walcott CB
You will need:
(item names are links)
The antenna itself-
pn- FL4B
(4’ antenna)
Or pn- FL3B
(3’ antenna)
Spring base-
pn- SS3H
DO NOT RUN WITHOUT A SPRING BASE.
PERIOD.
“Fire Ring” mount cord-
pn- K48R18
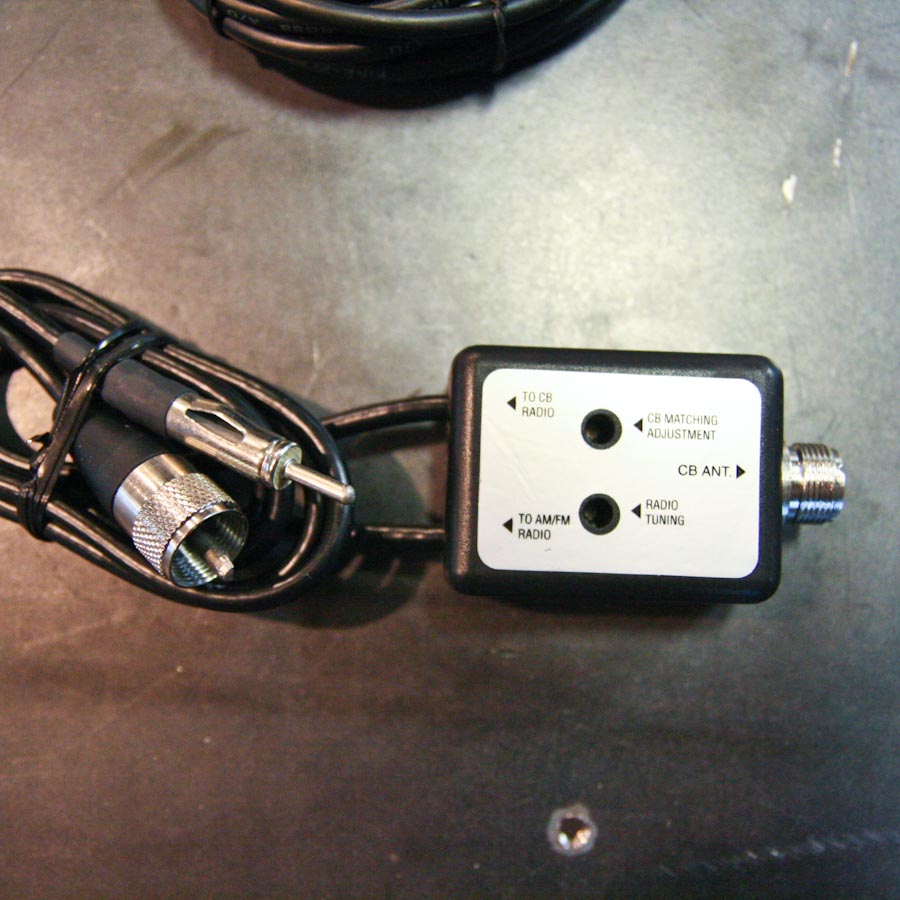
If you are going to use the antenna for both FM & CB you will need the splitter-
pn- AR1A
Don’t have an SWR meter?
you NEED one to set this up, the antenna and the splitter will require tuning.
Borrow one from a friend if you can, but if you want your own, I like
this little guy-
pn- SWR1
And don’t forget, a CB radio.
Im a fan of the Cobra 75WXST since all you have out is the hand unit and you can easily use it in multiple vehicles by just installing extra $24 control boxes.
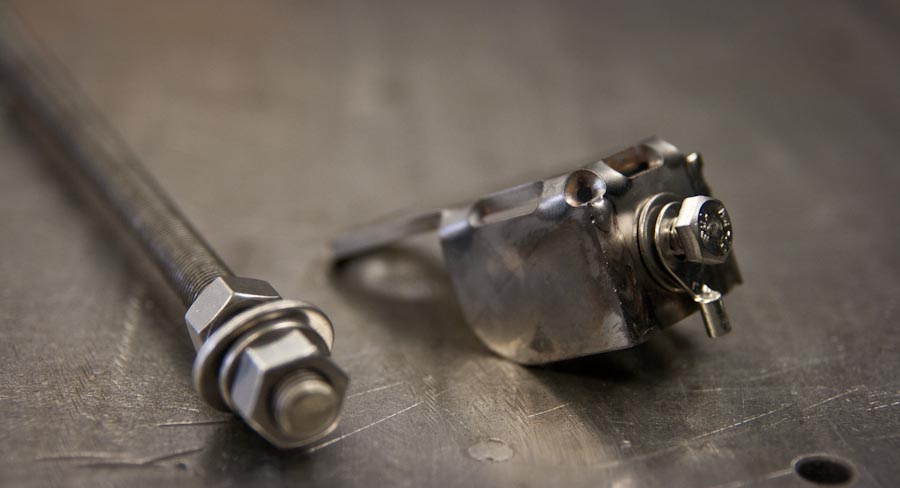
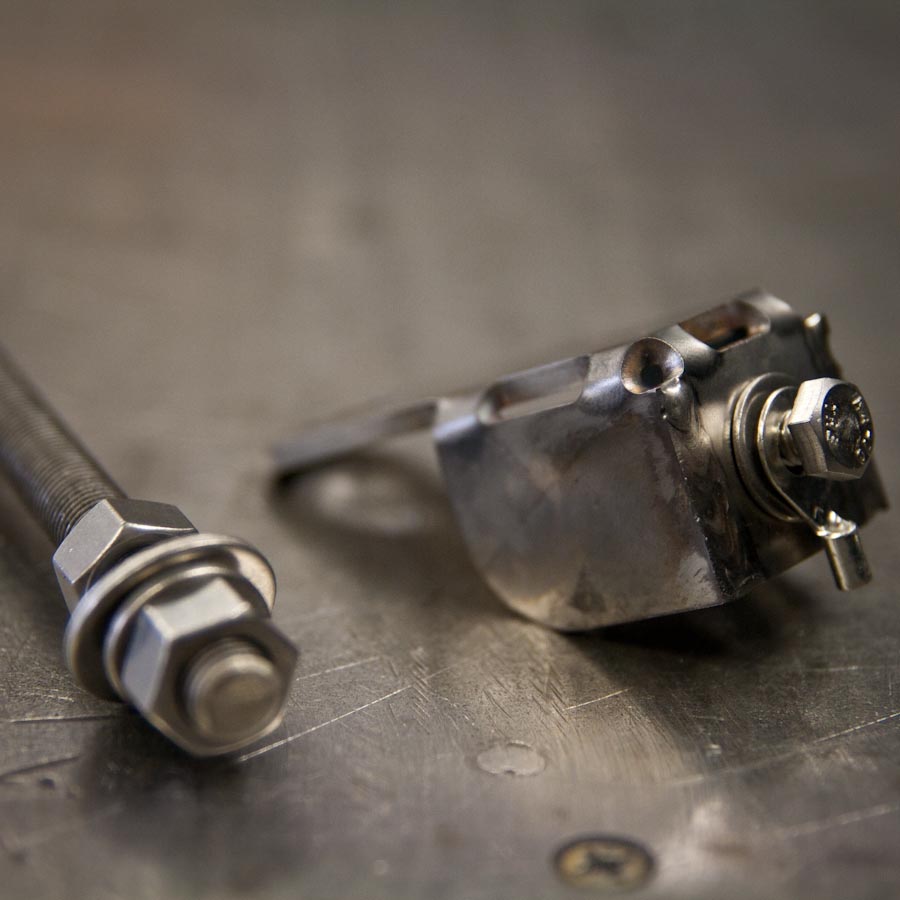
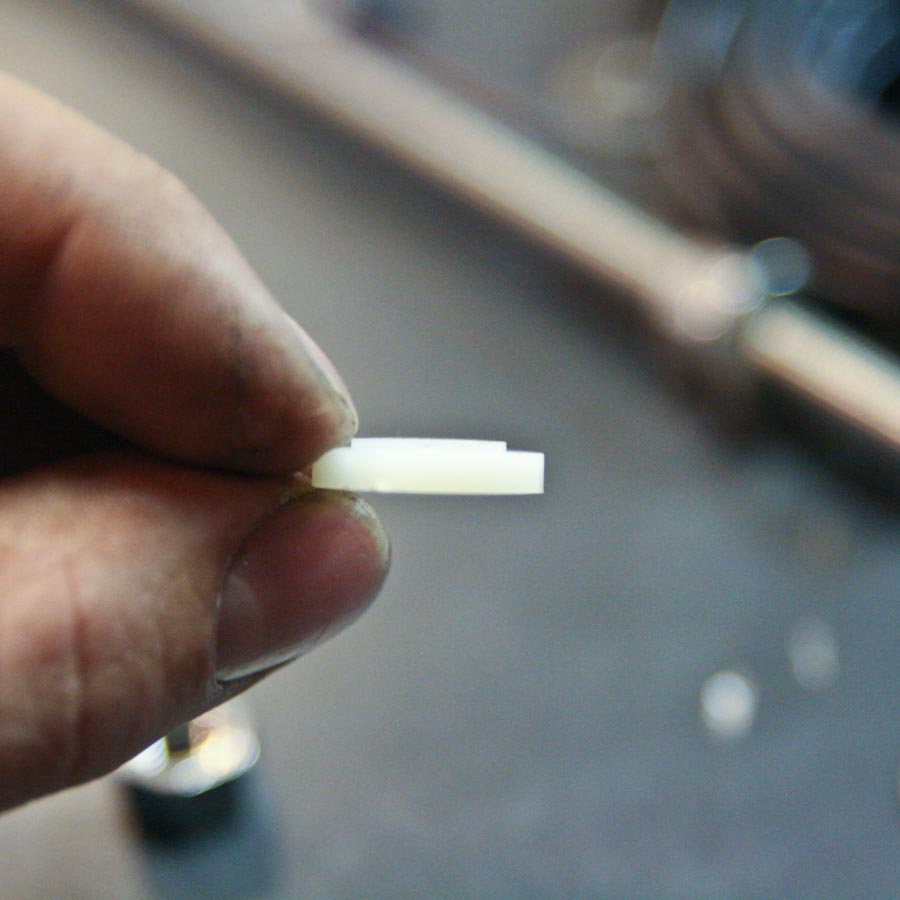
All the metal parts pictured here are part of the mount. The plastic parts pictured are the Fire-Ring base.
This photo shows the order of assembly, it is very important to get the parts oriented the correct way.

You can see that the plastic parts of the FireStik “Fire Ring” cord that I have this mount set up for have a lip, this lip needs to seat into the hole on the mount bracket or your antenna will have a short.
And here on the cord:
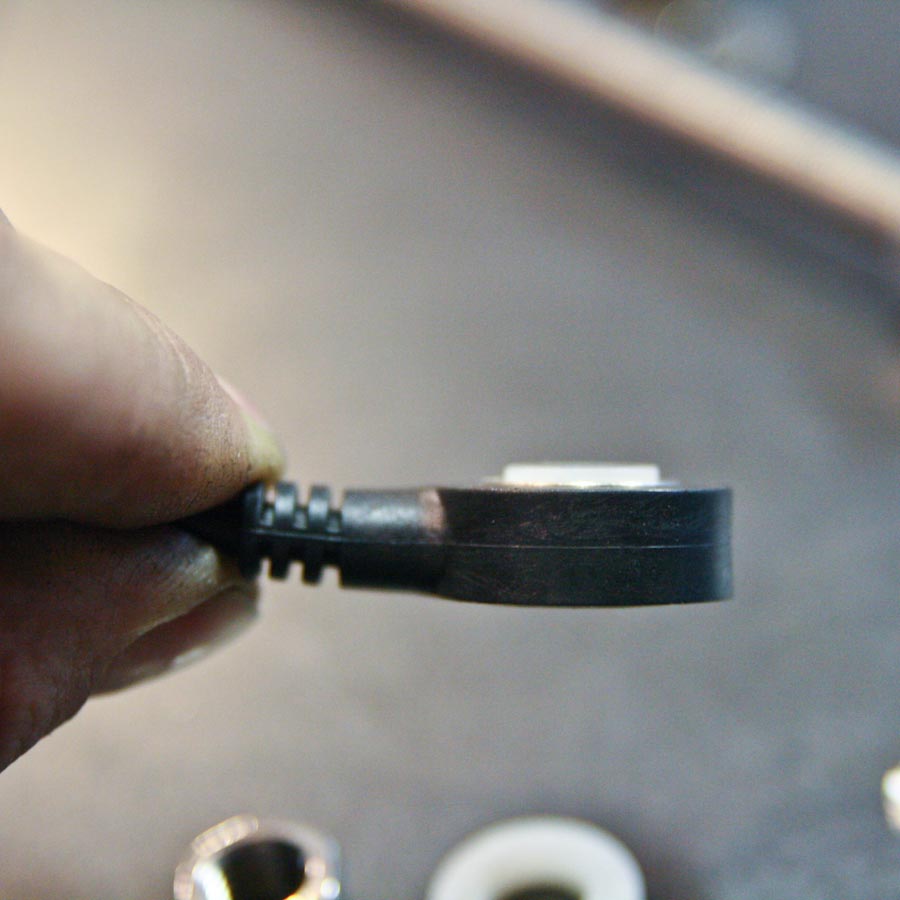
This diagram comes with the cord and displays the correct assembly order:
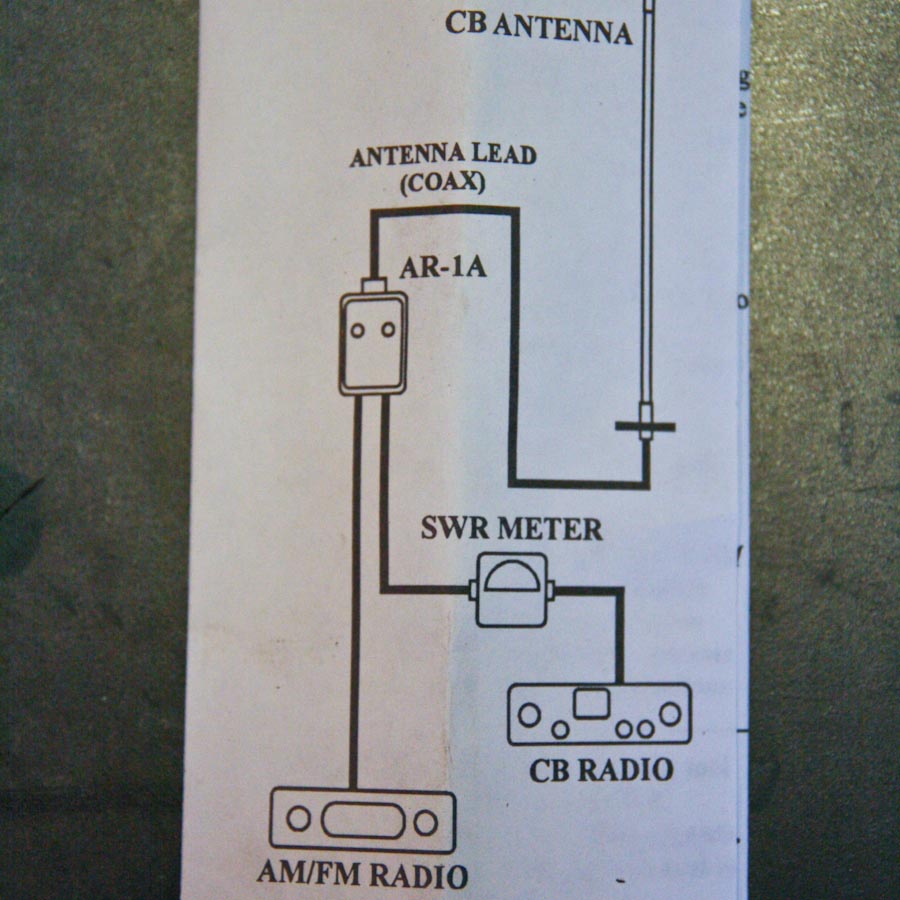
The other part of the puzzle is this splitter that allows the single antenna to be used for both FM and CB functions.
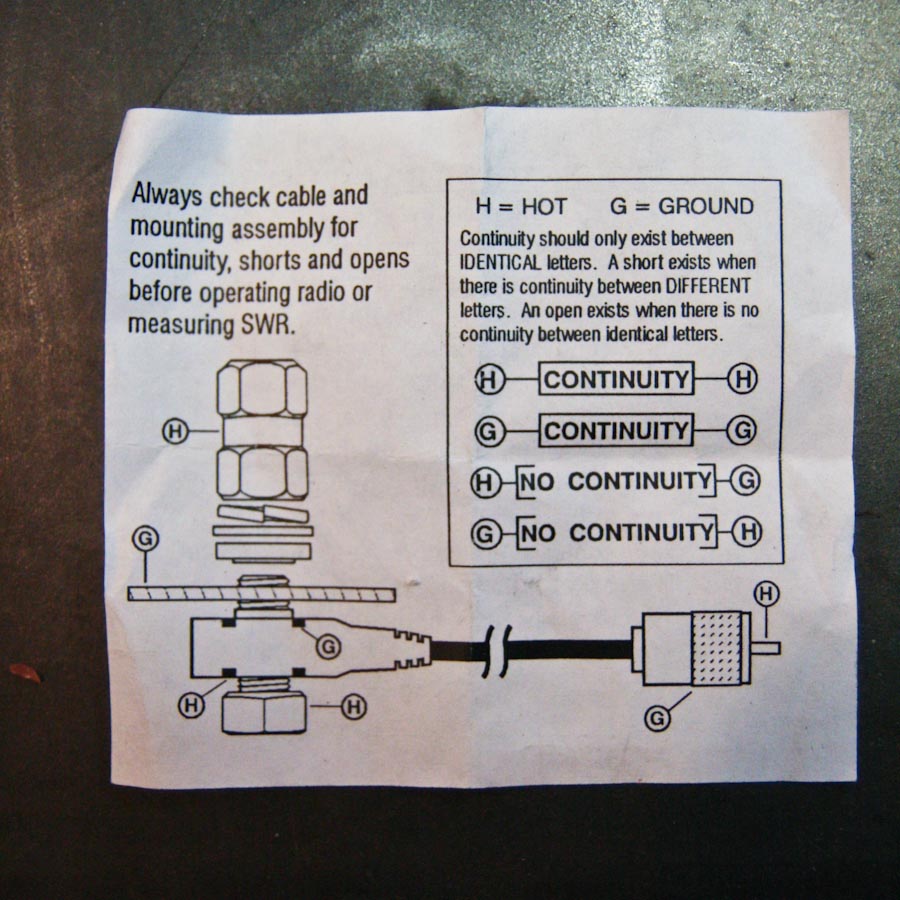
The diagram below, included with the splitter, shows the typical routing and SWR metering setup.
Actual installation is fairly simple.
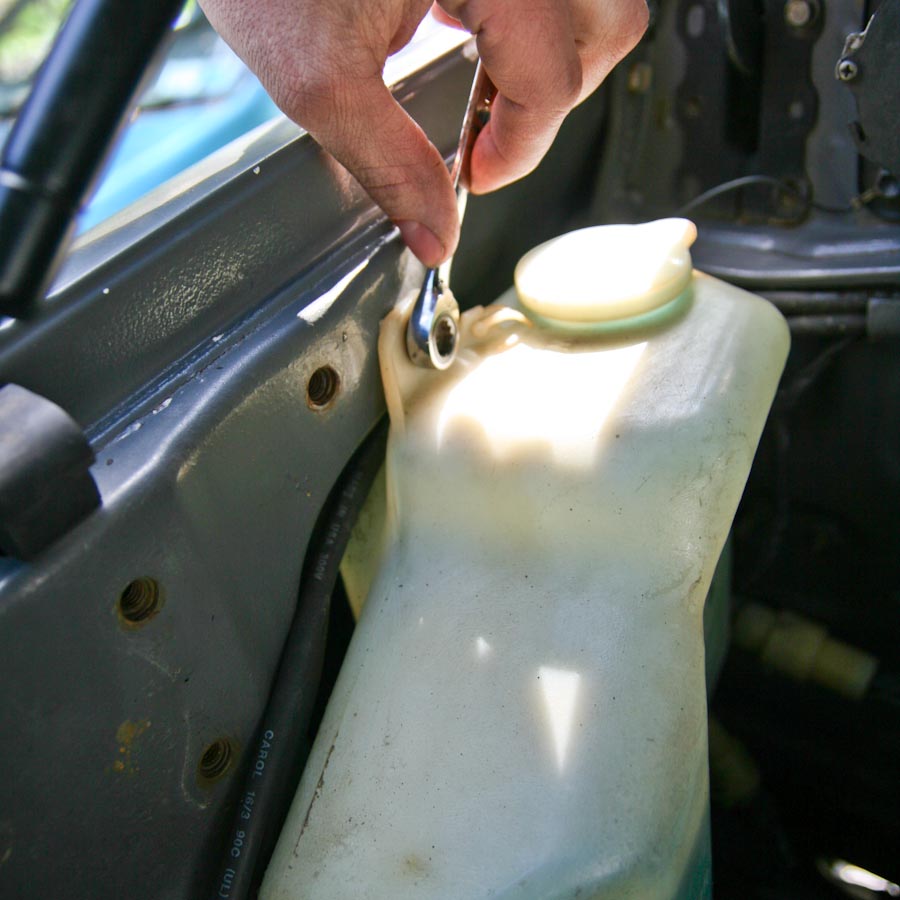
The window washer tank is removed by taking out the top bolt and just loosening the bottom two bolts.
Once that is out of the way you have easy access to the antenna.
There is a single bolt that holds the OE antenna in place (mine is long-gone, so no image of that) and once the stock antenna is removed, this new mount bolts in it’s place.
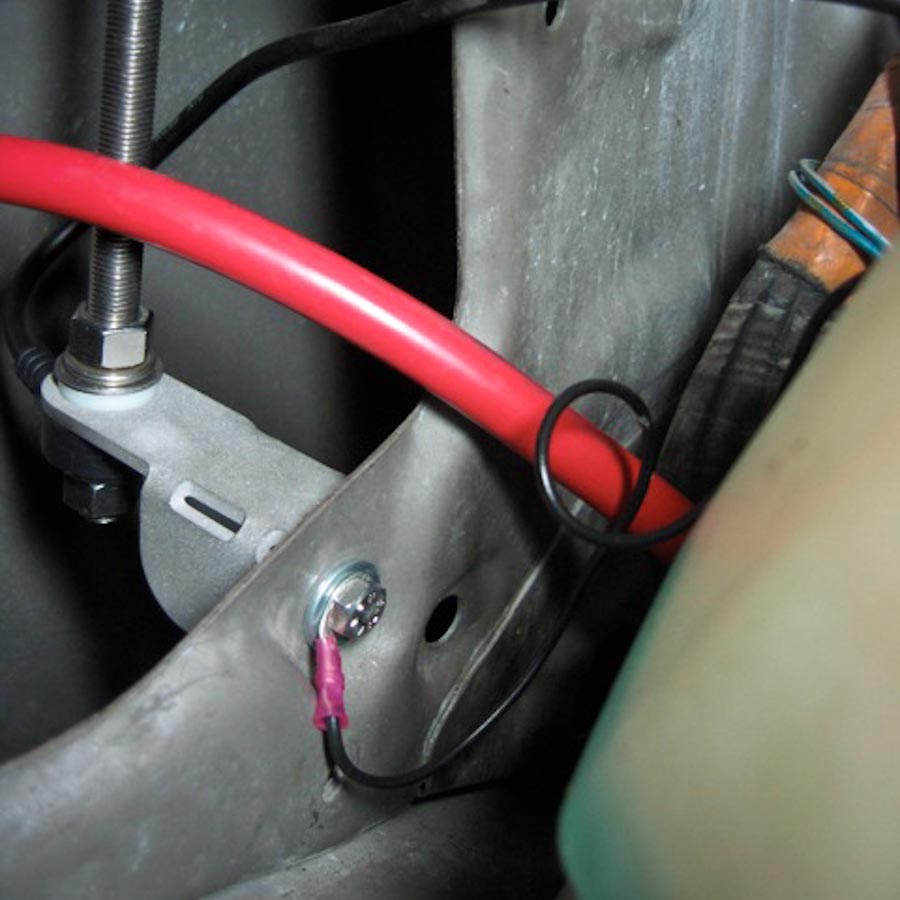
Supplied with the mount is a crimp on ring terminal for the mount ground, the OE mount will already have the ground wire routed to one of the wiper motor bolts, simply cut the end, crimp on this new terminal and install it with the new mount bolt.
The mount should be loosely assembled and then bolted into place, there is room to drop the assembly into the fender and run the rod out through the antenna hole, no need to risk loosing washers inside your fender.
And yes, I know my truck is rusty, thats not the worst of it.
But it’s also why all the parts of this mount are stainless steel.
You can see here that the bumper collar is right near the top of the rod, that is important since it provides a bumper for the rod inside the OE grommet.
The black part pictured here is the only OE part to be retained and is critical for this kit to work.
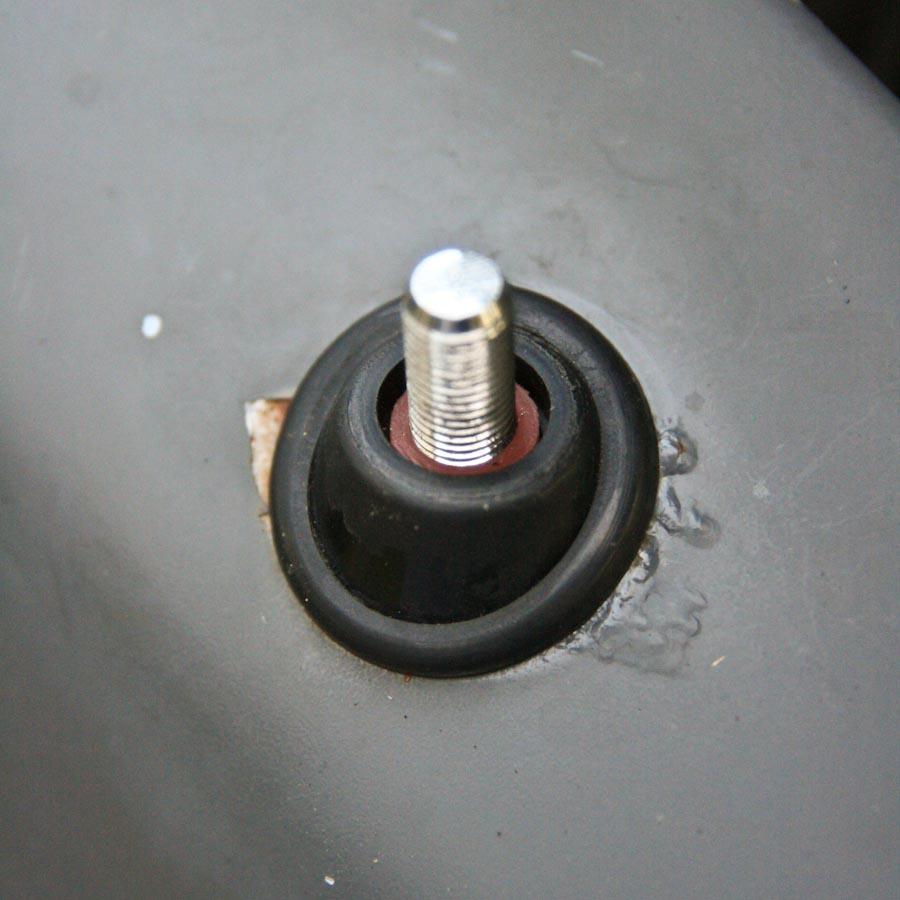
Once the grommet is on, slide the supplied rubber washer over the rod.
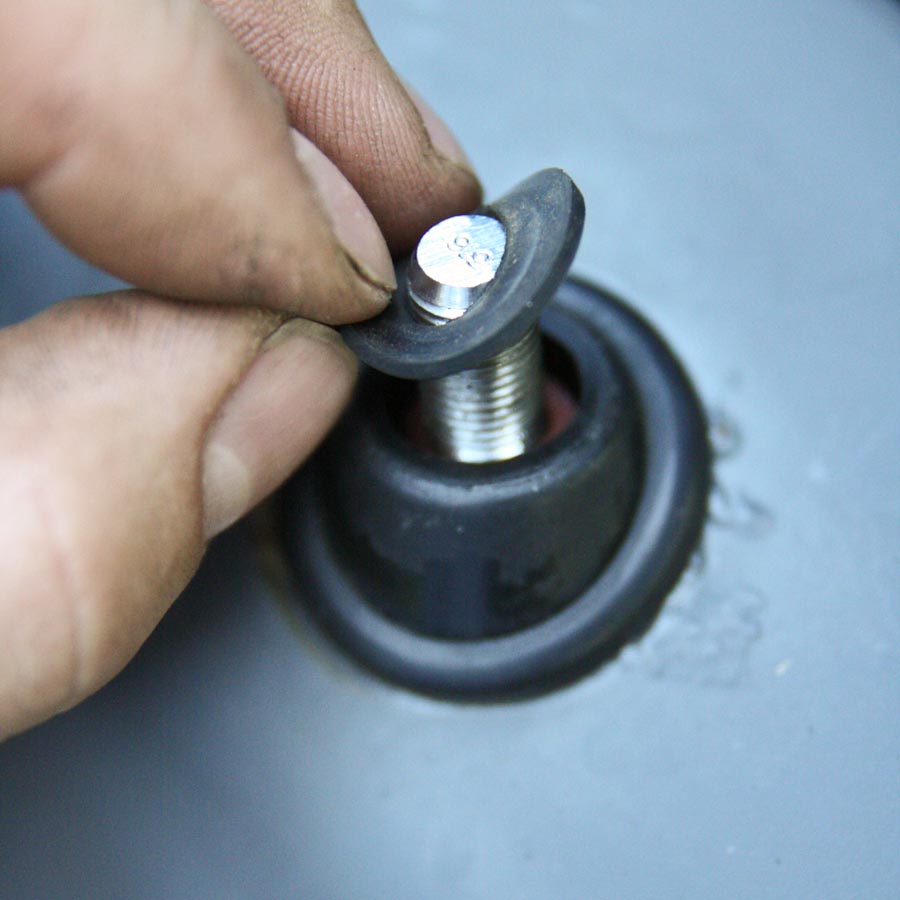
Then the stainless one.
(see, most of that rust is covered up)
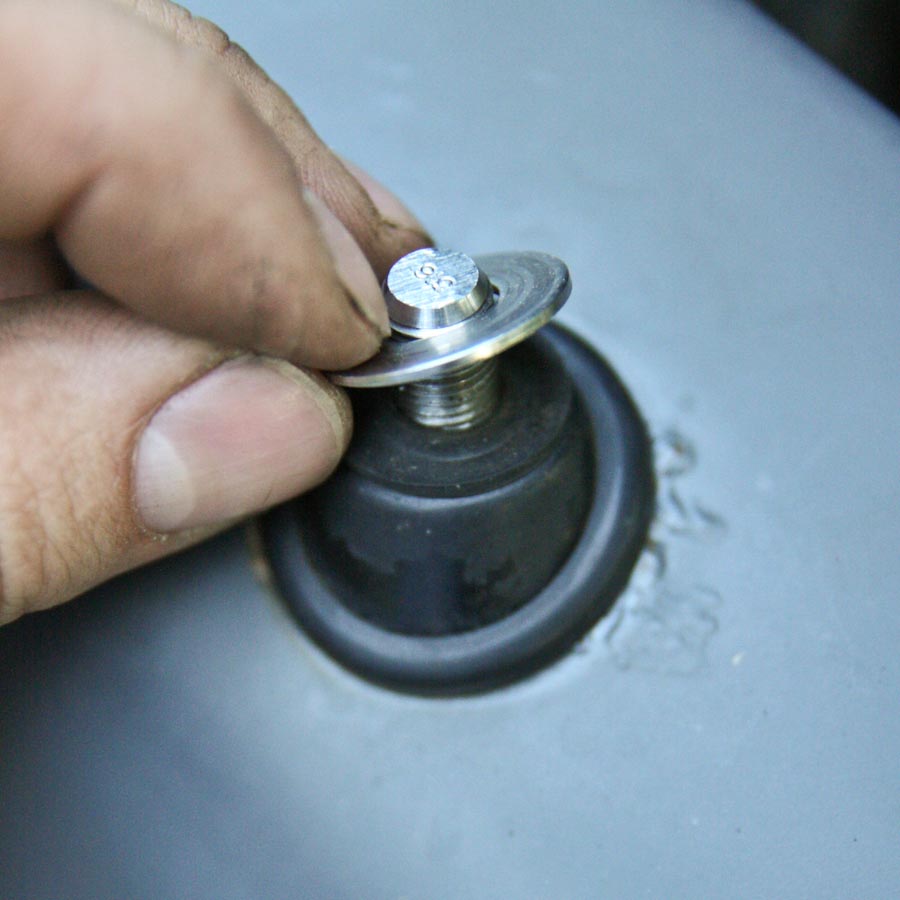
Then check that there is about 9/16s of an inch of thread protruding from the top of the assembly.
This can be adjusted by loosening and tightening the two nuts that locate the rod on the lower mount.
You want 9/16s” so that the spring mount compresses the grommet an appropriate amount and then bottoms out on the rod for a snug fit.
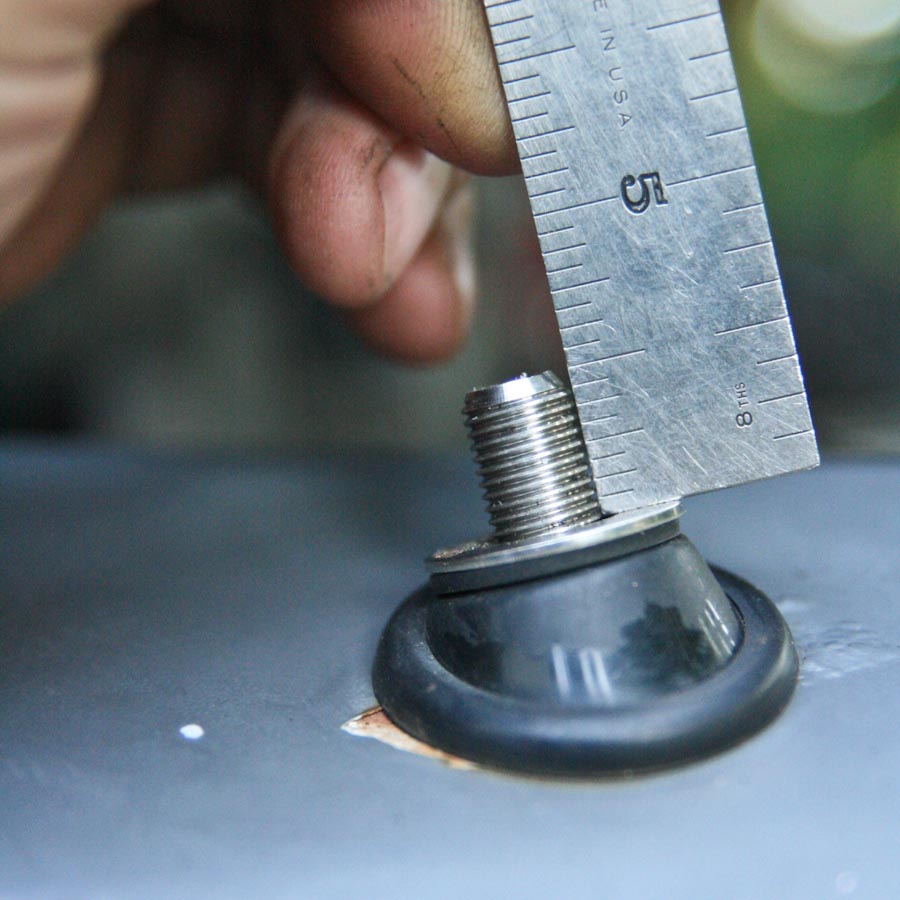
Once the rod is locked in place with the lower nuts, then thread the spring base into place.
Then thread the antenna on top of that and you have an assembled mount.
Now, you’re on your own for the radio.

For more info and pictures check out my friend Johnny’s antenna install thread on ih8mud here:
Learn More